Mini Pumpkin Hand Pies
November 18, 2021
-
Remove pie dough from the refrigerator and allow the sheets to come to room temperature while you prepare the filling.
-
In a bowl using a fork, mash and mix together the cream cheese and brown sugar.
-
Once smooth, mix in half of the pumpkin puree. Once fully combined, mix in the remaining pumpkin puree and pumpkin pie spice and salt.
-
Preheat the oven to 400F and line a large baking tray with parchment paper
-
Lightly dust your surface with flour and unroll one of the pie sheets. Use a rolling pin to gently smooth the surface, just enough to gently smooth out any of the wrinkles.
-
Using a pumpkin-shaped cookie cutter or homemade pumpkin template (could make a template out of the box the pie crust came in), cut out your pumpkins. Roll out scraps to cut out a few more pumpkins. You should be able to cut around 10 pumpkins per sheet.
-
Transfer these pumpkins to the refrigerator while you cut out the other sheet.
-
Now place half of the pumpkins onto the baking sheet, spaced evenly apart. If all 10 pumpkins won’t fit onto your baking sheet, leave the excess in the refrigerator and bake after the first batch is done.
-
Fill the center of each pumpkin with a tablespoon of the filling, leaving a small border around the edges.
-
Beat the egg with about 2 teaspoons of water. Brush the bare border of each filled pumpkin with the egg wash.
-
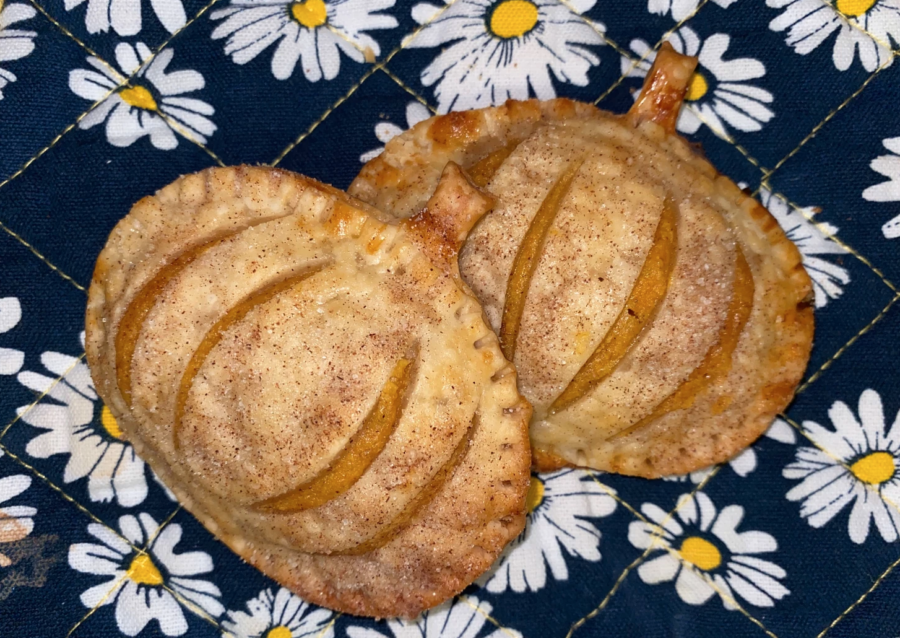
To the other half of the pumpkins, cut 4 slits (the slits will look similar to parentheses: a larger set on the outside with a narrow set on the inside) to resemble the ridges of a real pumpkin.
-
Place the vented pumpkins on top of the filled pumpkins and gently press down on the seams to seal the pie shut. Crimp the edges with a fork and brush the surface of each pumpkin with egg wash.
-
In a small dish, mix together the cinnamon and sugar. Sprinkle about 1 teaspoon of the cinnamon sugar on top of each pumpkin.
-
Bake for 12-14 minutes. Allow the pumpkins to cool on the baking sheet for about 5 minutes, then transfer to a cooling rack.
-
Enjoy!

